0x001 Scrapy 简介
Scrapy是Python开发的一个快速、高层次的屏幕抓取和web抓取框架,用于抓取web站点并从页面中提取结构化的数据。Scrapy用途广泛,可以用于数据挖掘、监测和自动化测试。
Scrapy吸引人的地方在于它是一个框架,任何人都可以根据需求方便的修改。它也提供了多种类型爬虫的基类,如BaseSpider、sitemap爬虫等,最新版本又提供了web2.0爬虫的支持。
0x002 Scrapy 架构
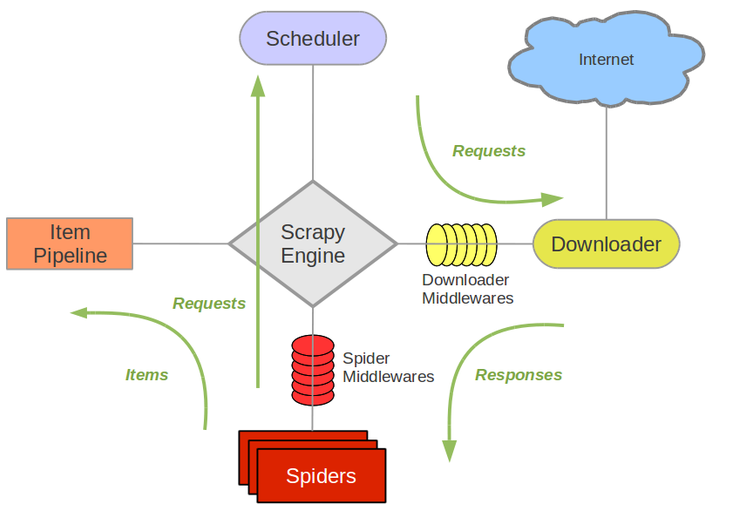
- Scrapy Engine(引擎): 负责
Spider、ItemPipeline、Downloader、Scheduler中间的通讯,信号、数据传递等。 - Scheduler(调度器): 它负责接受引擎发送过来的
Request请求,并按照一定的方式进行整理排列,入队,当引擎需要时,交还给引擎。 - Downloader(下载器): 负责下载Scrapy
Engine(引擎)发送的所有Requests请求,并将其获取到的Responses交还给Scrapy Engine(引擎),由引擎交给Spider来处理。 - Spider(爬虫): 它负责处理所有
Responses,从中分析提取数据,获取Item字段需要的数据,并将需要跟进的URL提交给引擎,再次进入Scheduler(调度器)。 - Item Pipeline(管道): 它负责处理
Spider中获取到的Item,并进行进行后期处理(详细分析、过滤、存储等)的地方。 - Downloader Middlewares(下载中间件): 一个可以自定义扩展下载功能的组件。
- Spider Middlewares(Spider中间件): 一个可以自定扩展和操作引擎和
Spider中间通信的功能组件
0x003 Scrapy 原理
- 引擎从调度器中取出一个链接(
URL)用于接下来的抓取。 - 引擎把
URL封装成一个请求(Request)传给下载器。 - 下载器把资源下载下来,并封装成应答包(
Response) - 爬虫解析
Response - 解析出实体(
Item),则交给实体管道进行进一步处理 - 解析出的是衔接(
URL),则把URL交给调度器等待抓取
0x004 Scrapy 安装
Windows平台:
1. pip3 install wheel

2. 安装Twisted
    进入http://www.lfd.uci.edu/~gohlke/pythonlibs/#twisted
    根据自身系统环境选择下载。
    比如我的win10 64位 python3.7
    则下载Twisted‑19.10.0‑cp37‑cp37m‑win_amd64.whl
    进入本地下载后的文件夹
    pip3 install Twisted‑19.10.0‑cp37‑cp37m‑win_amd64.whl

3. pip3 install lxml

4. pip3 install pyopenssl

5. pip3 install pypiwin32

6. pip3 install scrapy
Linux平台:
pip3 install Scrapypip加速:
在国内
pip下载速度特别慢,经常会下载失败,建议更改国内源下载。查看文章 –> Python pip配置国内源
命令行工具
成功安装好Scrapy后,在命令行里输入scrapy -h 即可查看帮助
#1 查看帮助
    scrapy -h
    scrapy <command> -h

#2 有两种命令:其中Project-only必须切到项目文件夹下才能执行,而Global的命令则不需要
    Global commands:
        startproject #创建项目
        genspider    #创建爬虫程序
        settings     #如果是在项目目录下,则得到的是该项目的配置
        runspider    #运行一个独立的python文件,不必创建项目
        shell        #scrapy shell url地址  在交互式调试,如选择器规则正确与否
        fetch        #独立于程单纯地爬取一个页面,可以拿到请求头
        view         #下载完毕后直接弹出浏览器,以此可以分辨出哪些数据是ajax请求
        version      #scrapy version 查看scrapy的版本,scrapy version -v查看scrapy依赖库的版本
    Project-only commands:
        crawl        #运行爬虫,必须创建项目才行,确保配置文件中ROBOTSTXT_OBEY = False
        check        #检测项目中有无语法错误
        list         #列出项目中所包含的爬虫名
        edit         #编辑器,一般不用
        parse        #scrapy parse url地址 --callback 回调函数  #以此可以验证我们的回调函数是否正确
        bench        #scrapy bentch压力测试
0x005 Scrapy 实战案例(单页面)
- 新建项目 :新建一个新的爬虫项目
- 明确目标 :明确你想要抓取的目标
- 制作爬虫 :制作爬虫开始爬取网页
- 存储内容 :设计管道存储爬取内容
步骤一 新建爬虫项目
新建一个名为 mySpider 的爬虫项目
scrapy startproject mySpider输入完命令后,在当前目录下会出现一个mySpider的文件夹,目录结构如下
mySpider/
    scrapy.cfg
    mySpider/
        __init__.py
        items.py
        pipelines.py
        settings.py
        spiders/
            __init__.py
            ...
文件说明:
scrapy.cfg项目的配置信息。主要为Scrapy命令行工具提供一个基础的配置信息。(真正爬虫相关的配置信息在settings.py文件中)mySpider/项目的Python模块,将会从这里引用代码。mySpider/items.py项目的目标文件。设置数据存储模板,用于结构化数据。mySpider/pipelines.py项目的管道文件。数据处理行为,如:一般结构化的数据持久化mySpider/settings.py项目的配置文件,如:递归的层数、并发数,延迟下载等mySpider/spiders/爬虫代码目录,如:创建文件,编写爬虫规则
步骤二 明确抓取目标
- 明确目标:爬取
http://www.itcast.cn/channel/teacher.shtml页面中所有讲师的姓名、职称和个人信息。 - 打开编写
mySpider目录下的items.py。 - 自定义 姓名
name、职称title和 个人信息info等字段
import scrapy

class MyspiderItem(scrapy.Item):
    # define the fields for your item here like:
    name = scrapy.Field()
    title = scrapy.Field()
    info = scrapy.Field()
步骤三 制作爬虫代码
在 mySpider/ 目录下输入命令,将会在 mySpider/spider 目录下自动生成一个名为 itcast.py 的爬虫文件,并指定爬取域的范围为 itcast.cn ,注意这里的爬虫名不能与项目名称起一样的。
scrapy genspider itcast "itcast.cn"打开 mySpider/spider 目录里的 itcast.py,自动生成了下列代码:
import scrapy

class ItcastSpider(scrapy.Spider):
    name = "itcast"
    allowed_domains = ["itcast.cn"]
    start_urls = ['http://www.itcast.cn/']

    def parse(self, response):
        pass
参数介绍:
name = "":这个爬虫的识别名称,必须是唯一的,在不同的爬虫必须定义不同的名字。allow_domains = []是搜索的域名范围,也就是爬虫的约束区域,规定爬虫只爬取这个域名下的网页,不存在的URL会被忽略。start_urls = ():爬取的URL元祖/列表。爬虫从这里开始抓取数据,所以,第一次下载的数据将会从这些urls开始。其他子URL将会从这些起始URL中继承性生成。parse(self, response):负责解析返回的网页数据(response.body),提取结构化数据(生成item),生成需要下一页的URL请求。
导入刚才编写的items.py文件
from mySpider.items import MyspiderItem将start_urls的值修改为需要爬取的初始url
start_urls = ["http://www.itcast.cn/channel/teacher.shtml"]修改parse()方法,使用XPath语法对返回的response网页数据进行匹配提取
def parse(self, response):
    items = []
    for each in response.xpath("//div[@class='li_txt']"): # 循环匹配每个教师的数据
        item = MyspiderItem() # 实例化MyspiderItem类
        name = each.xpath("h3/text()").extract() # 匹配姓名
        title = each.xpath("h4/text()").extract() # 匹配职称
        info = each.xpath("p/text()").extract() # 匹配个人信息
        # 将匹配到的值添加到item中
        item['name'] = name[0]
        item['title'] = title[0]
        item['info'] = info[0]
        items.append(item) # 将item中的值添加到items
return items # 函数返回itemsScrapy支持正则语法、CSS语法和XPath语法对网页内容进行匹配,这里推荐使用XPath语法,Scrapy官网也是默认支持使用XPath语法。
以上parse()方法用到了XPath语法对指定内容进行匹配,如果有学过CSS,那么这里就非常容易理解XPath语法了。
下面将简单对
XPath语法举例介绍,更多详细点击查看XPath教程
首先分析源代码,找到我们所需要的内容
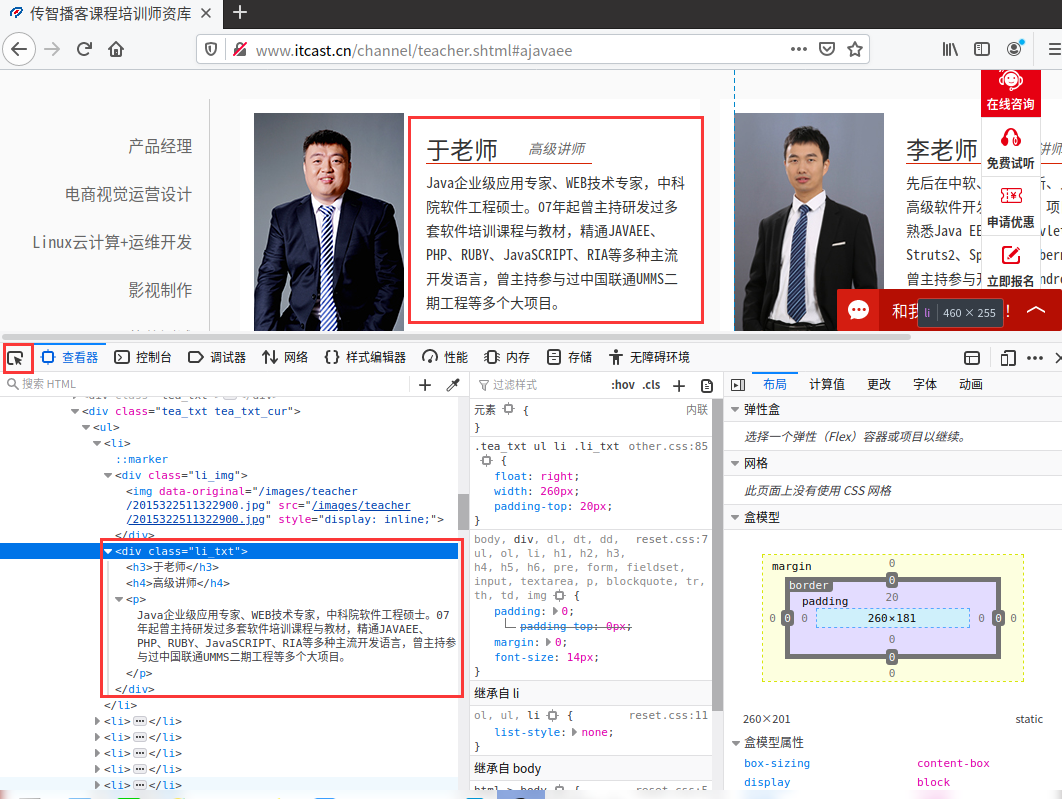
先介绍个简单的方法,可以直接在火狐或者谷歌浏览器中,找到相应的位置,鼠标右键->复制->XPath可以直接生成XPath语句。
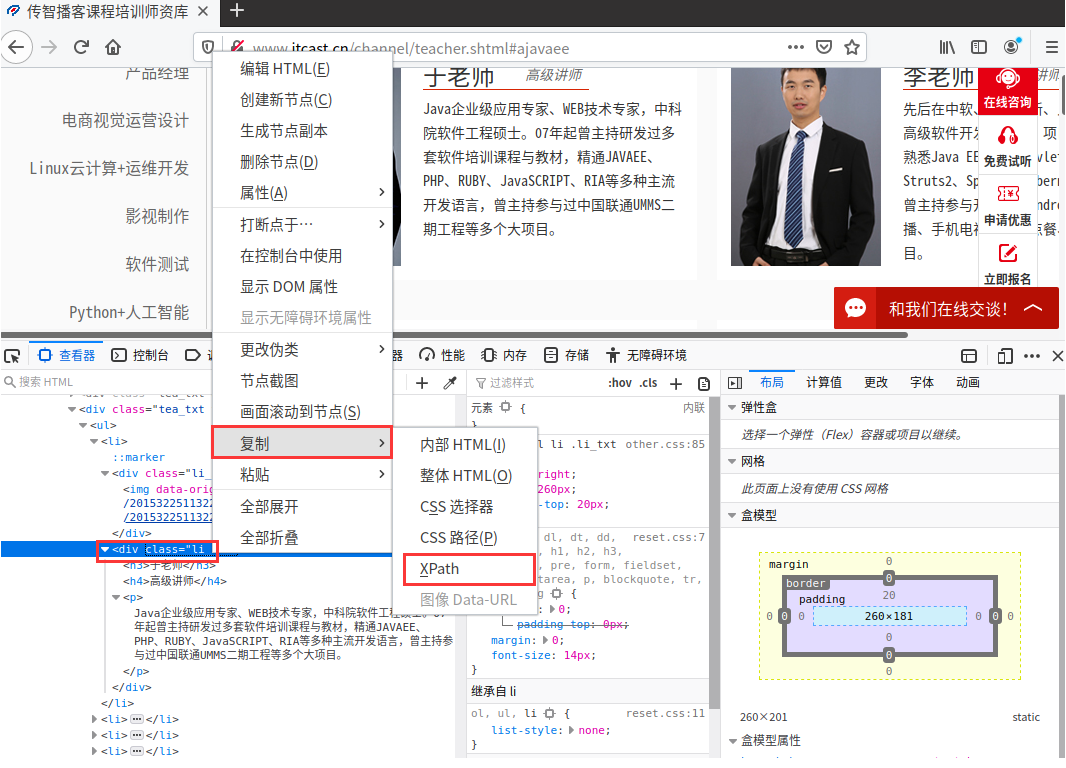
复制生成的代码如下
/html/body/div[1]/div[5]/div/div[2]/div[13]/ul/li[1]/div[2]这样方法生成的XPath语句非常的长,而且不容易理解。
接下来手动构造的XPath语句进行内容匹配
以上图源码为例
<div class="li_txt">
    <h3>于老师</h3>
    <h4>高级讲师</h4>
    <p>Java企业级应用专家、WEB技术专家,中科院软件工程硕士。07年起曾主持研发过多套软件培训课程与教材,精通JAVAEE、PHP、RUBY、JavaSCRIPT、RIA等多种主流开发语言,曾主持参与过中国联通UMMS二期工程等多个大项目。</p>
</div>现在要匹配class为li_txt的div,构造XPath语句为
//div[@class='li_txt']进一步匹配该div下的h3标签的内容,构造XPath语句为
//div[@class='li_txt'][1]/h3/text()从以上两个匹配例子可以很清楚的知道我们所要匹配的是什么,其中
//表示任意的,后接div表示当前页面所有的div,而div后接的[@class='li_txt']表示指定class为li_txt的div,/表示该div紧接下一级内的子标签h3,text()表示当前h3中的文本内容
到目前为止,已经成功使用了XPath语法,但是难免保证匹配到的都是正确的结果,所以接下来我们需要验证下我们的XPath是否正确
一种办法是使用谷歌浏览器的插件:XPath Helper。需要从谷歌网上应用店下载,如果没有梯子的话访问不了,这里推荐一个免费的梯子,有需要的可以下载佛跳墙,连接上梯子网络后,即可访问谷歌应用商店搜索下载插件

安装完插件后,点击右上角的X图标即可启动,然后在左边输入框中输入XPath语句,右边实时显示匹配的结果,清晰明了。
但此时Scrapy通过response.xpath(语法)不是直接获取字符串,我们需要将其转为字符串格式,通过以下方式可以得到字符串
response.xpath().get()  # 得到一个元素
response.xpath().getall()  # 得到多个元素
response.xpath()..extract()[0]  # 得到一个元素
response.xpath()..extract_first() # 得到一个元素另一种方法是通过Scrapy自带的交互式shell来准确验证XPath语句,具体在命令行操作如下,如果能正确print()输出结果,则表示XPath正确。
zmj@ubuntu:~/桌面$ scrapy shell http://www.itcast.cn/channel/teacher.shtml
2020-03-21 07:04:51 [scrapy.utils.log] INFO: Scrapy 2.0.0 started (bot: scrapybot)
......
2020-03-21 07:04:51 [scrapy.core.engine] INFO: Spider opened
2020-03-21 07:04:51 [scrapy.core.engine] DEBUG: Crawled (200) <GET http://www.itcast.cn/channel/teacher.shtml> (referer: None)
[s] Available Scrapy objects:
[s]   scrapy     scrapy module (contains scrapy.Request, scrapy.Selector, etc)
[s]   crawler    <scrapy.crawler.Crawler object at 0x7f963e8140d0>
[s]   item       {}
[s]   request    <GET http://www.itcast.cn/channel/teacher.shtml>
[s]   response   <200 http://www.itcast.cn/channel/teacher.shtml>
[s]   settings   <scrapy.settings.Settings object at 0x7f963e80ff10>
[s]   spider     <DefaultSpider 'default' at 0x7f963e369210>
[s] Useful shortcuts:
[s]   fetch(url[, redirect=True]) Fetch URL and update local objects (by default, redirects are followed)
[s]   fetch(req)                  Fetch a scrapy.Request and update local objects
[s]   shelp()           Shell help (print this help)
[s]   view(response)    View response in a browser
In [1]: res = response.xpath("//div[@class='li_txt']/h3/text()")

In [2]: print(res)
[<Selector xpath="//div[@class='li_txt']/h3/text()" data='王老师'>,
<Selector xpath="//div[@class='li_txt']/h3/text()" data='孙老师'>,
<Selector xpath="//div[@class='li_txt']/h3/text()" data='李老师'>,
...]
最后总结 mySpider/spider/itcast.py 代码如下
# -*- coding: utf-8 -*-
import scrapy
from mySpider.items import MyspiderItem

class ItcastSpider(scrapy.Spider):
    name = 'itcast'
    allowed_domains = ['itcast.cn']
    start_urls = ['http://www.itcast.cn/channel/teacher.shtml']

    def parse(self, response):
        items = [] # 存放老师信息的集合
        for each in response.xpath("//div[@class='li_txt']"):
            item = MyspiderItem()
            #extract()方法返回的都是unicode字符串
            name = each.xpath("h3/text()").extract()
            title = each.xpath("h4/text()").extract()
            info = each.xpath("p/text()").extract()
             #xpath返回的是包含一个元素的列表
            item['name'] = name[0]
            item['title'] = title[0]
            item['info'] = info[0]
            items.append(item)
        # 直接返回最后数据
        return items
步骤四 存储爬取内容
首先编辑 mySpider/ 目录下的 settings.py文件,找到如下代码去除注释。这么做的目的是为了防止某些网站使用了反爬虫策略,进行绕过。
ROBOTSTXT_OBEY = False # 是否遵循robotstxt守则,改为False

DEFAULT_REQUEST_HEADERS = {
   'Accept': 'text/html,application/xhtml+xml,application/xml;q=0.9,image/webp,*/*;q=0.8',
   'Accept-Language': 'zh-CN,zh;q=0.8,zh-TW;q=0.7,zh-HK;q=0.5,en-US;q=0.3,en;q=0.2',
   'User-Agent': 'Mozilla/5.0 (Windows NT 10.0; Win64; x64; rv:74.0) Gecko/20100101 Firefox/74.0',
}

ITEM_PIPELINES = {
    'mySpider.pipelines.MyspiderPipeline': 300,
}
上面的 DEFAULT_REQUEST_HEADERS 中的为请求头中的数据,我们可以在浏览器中->检查元素->网络->刷新加载->查看请求头 中获取数据

Scrapy保存信息的最简单的方法主要有四种,-o 输出指定格式的文件,命令如下:
scrapy crawl itcast -o teachers.jsonjson lines格式,默认为Unicode编码
scrapy crawl itcast -o teachers.jsonlxml格式
scrapy crawl itcast -o teachers.xmlcsv 逗号表达式,可用Excel打开
scrapy crawl itcast -o teachers.csv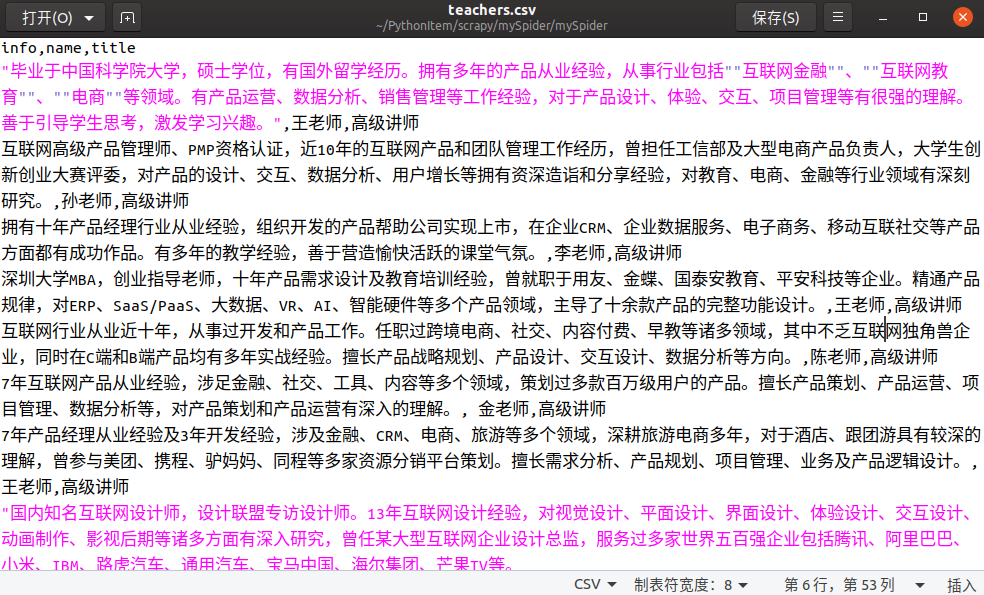
注意:当保存成json格式时,并不会直接生成中文,还是一长串字符格式,具体效果如下
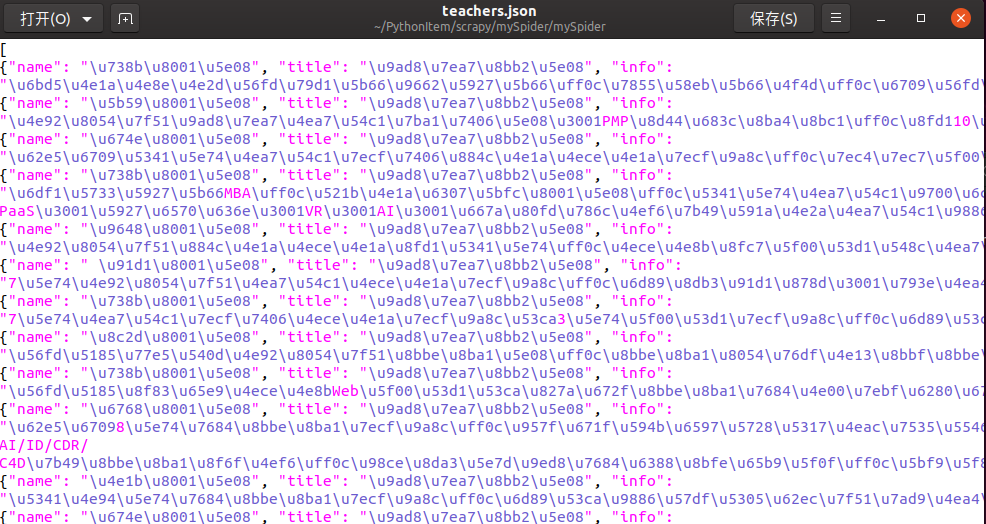
为了解决这个问题,我们可以自定义数据保存的格式
编辑管道文件 mySpider/pipelines.py,默认增加的代码如下
# -*- coding: utf-8 -*-

class MyspiderPipeline(object):
    def process_item(self, item, spider):
        return item
将其修改为如下代码
# -*- coding: utf-8 -*-

import json

class MyspiderPipeline(object):
    def __init__(self):
        self.filename = open("teacher.json","w")

    def process_item(self, item, spider):
        text = json.dumps(dict(item),ensure_ascii = False) + "\n"
        self.filename.write(str(text))
        return item

    def close_spider(self,spider):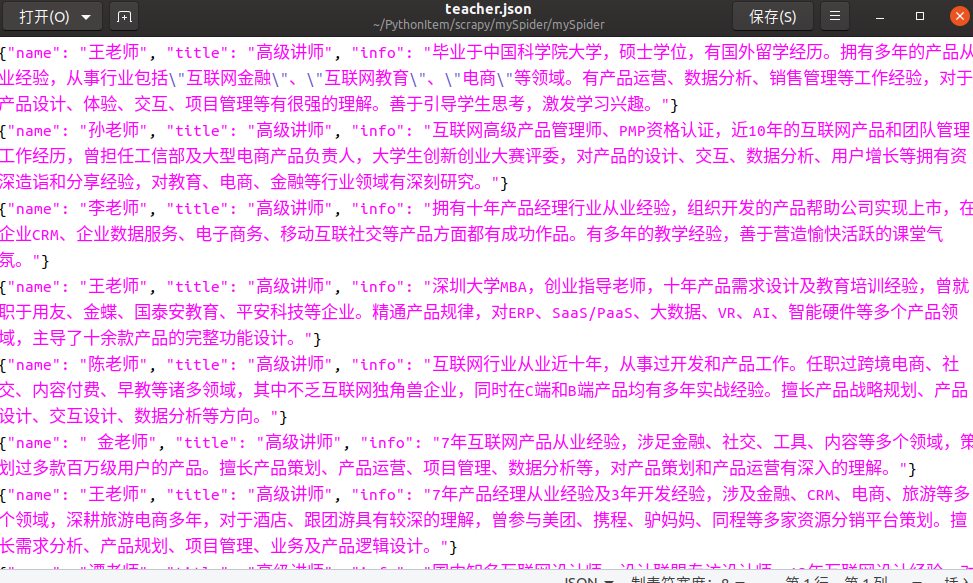
self.filename.close()然后回到mySpider/目录下,执行运行命令
scrapy crawl itcast此时成功将存储的json数据变为中文格式
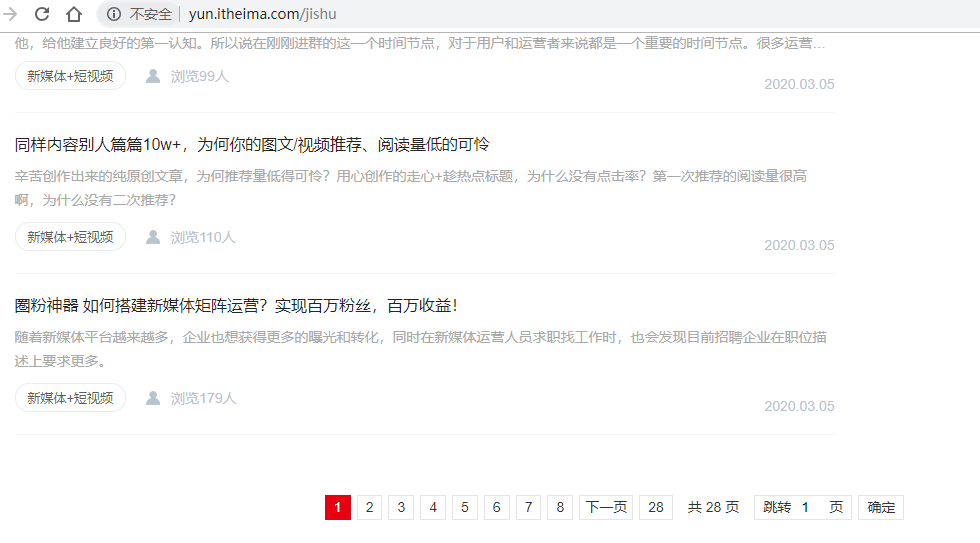
0x006 Scrapy 实战案例(分页面)
在上一个案例中,介绍了如何爬取单页面的内容,接下来介绍下如何在分页模式进行爬取多页面内容。本次案例目标网站页面如下
步骤一 新建爬虫项目
新建一个名为 itheimaSpider 的爬虫项目,建议项目名字均以 网站域名+Spider格式命名。
scrapy startproject itheimaSpider步骤二 明确抓取目标
- 明确目标:爬取
http://yun.itheima.com/jishu/index/p/1.html所有分页中的文章标题、介绍、链接、标签、浏览数和日期。 - 打开编写
itheimaSpider/目录下的items.py。
import scrapy

class ItheimaspiderItem(scrapy.Item):
    # define the fields for your item here like:
    itheima_title = scrapy.Field()
    itheima_introduce = scrapy.Field()
    itheima_url = scrapy.Field()
    itheima_tag = scrapy.Field()
    itheima_view = scrapy.Field()
    itheima_time = scrapy.Field()
步骤三 制作爬虫代码
在 itheimaSpider/ 目录下输入命令,自动生成 itheima爬虫文件,注意爬虫文件名不要与项目名一样
scrapy genspider itheima "itheima.com"编辑 itheimaSpider/spider/itheima.py 文件
从源码分析一下页面跳转链接之间的url的区别
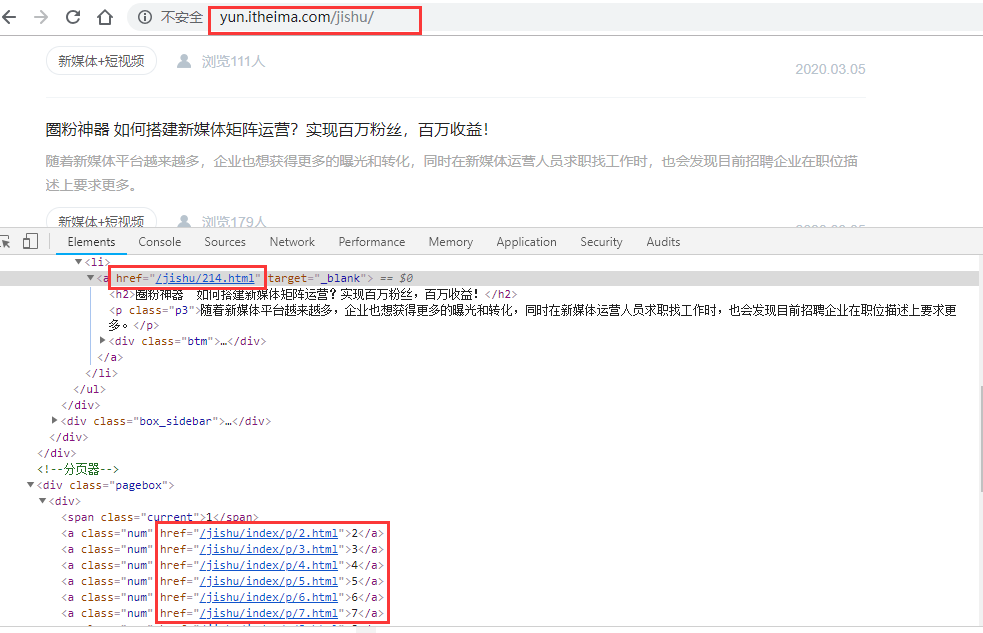
从这几个链接很容易可以看出,页面之间的跳转链接是由yun.itheima.com和各a标签中的href属性拼接而成的
提取出url相同的部分
url = "http://yun.itheima.com"修改置start_urls值
start_urls = ['http://yun.itheima.com/jishu/']导入items模块
from itheimaSpider.items import ItheimaspiderItemXPath语法匹配指定内容
//div[@class='fl']/ul/li/a/h2/text() # 标题
//div[@class='fl']/ul/li/a/p/text() # 介绍
//div[@class='fl']/ul/li/a/@href # 文章链接
//div[@class='fl']/ul/li/a/div/h3/text() # 标签
//div[@class='fl']/ul/li/a/div/p[1]/text() # 浏览数
//div[@class='fl']/ul/li/a/div/p[2]/text() # 日期

//div[@class='pagebox']/div/a[@class='next']/@href # 下一页链接提取匹配出每篇文章各自内容的XPath语句部分,作为循环主体
//div[@class='fl']/ul/li然后再子循环读取每篇文章下各自的内容
# 循环读取文章主体
for line in response.xpath("//div[@class='fl']/ul/li"):
    # 子循环读取文章内容
    item = ItheimaspiderItem()
    item['itheima_title'] = line.xpath("./a/h2/text()").get() # 标题
    item['itheima_introduce'] = line.xpath("./a/p/text()").get() # 介绍
    item['itheima_url'] = self.url + line.xpath("./a/@href").get() # 文章链接
    item['itheima_tag'] = line.xpath("./a/div/h3/text()").get() # 标签
    item['itheima_view'] = line.xpath("./a/div/p[1]/text()").get() # 浏览数
    item['itheima_time'] = line.xpath("./a/div/p[2]/text()").get() # 日期
    # 返回item
yield item为了能够获取所有分页面的内容,需要自动获取下一页的跳转url,这里使用XPath匹配到下一页a标签的href属性,然后拼接上http://yun.itheima.com即可。
# 翻页操作
next_page = response.xpath("//div[@class='pagebox']/div/a[@class='next']/@href").get()
if next_page: # 判断是否有下一页
    # 拼接下一页的网址
    next_url = response.urljoin(next_page)
    # 发出Request请求,callback回调parse函数
    yield scrapy.Request(next_url, callback = self.parse)
最后总结下 itheimaSpider/spiders/itheima.py 代码
# -*- coding: utf-8 -*-
import scrapy

from itheimaSpider.items import ItheimaspiderItem

class ItheimaSpider(scrapy.Spider):
    name = 'itheima'
    allowed_domains = ['itheima.com']
    start_urls = ['http://yun.itheima.com/jishu/']
    url = "http://yun.itheima.com" # 提取URL相同的部分

    def parse(self, response):
        # 循环读取文章主体
        for line in response.xpath("//div[@class='fl']/ul/li"):
            # 子循环读取文章内容
            item = ItheimaspiderItem()
            item['itheima_title'] = line.xpath("./a/h2/text()").get()
            item['itheima_introduce'] = line.xpath("./a/p/text()").get()
            item['itheima_url'] = url + line.xpath("./a/@href").get()
            item['itheima_tag'] = line.xpath("./a/div/h3/text()").get()
            item['itheima_view'] = line.xpath("./a/div/p[1]/text()").get()
            item['itheima_time'] = line.xpath("./a/div/p[2]/text()").get()
            # 返回item
            yield item

        # 翻页操作
        next_page = response.xpath("//div[@class='pagebox']/div/a[@class='next']/@href").get()
        if next_page:
            # 拼接下一页的网址
            next_url = response.urljoin(next_page)
            # 发出Request请求,callback回调parse函数
            yield scrapy.Request(next_url, callback = self.parse)
步骤四 存储爬取内容
编辑 itheimaSpider/ 目录下的 settings.py 文件,找到如下代码去除注释并修改代码。
ROBOTSTXT_OBEY = False

DEFAULT_REQUEST_HEADERS = {
   'Accept': 'text/html,application/xhtml+xml,application/xml;q=0.9,image/webp,image/apng,*/*;q=0.8',
   'User-Agent': 'Mozilla/5.0 (Windows NT 10.0; Win64; x64) AppleWebKit/537.36 (KHTML, like Gecko) Chrome/71.0.3578.98 Safari/537.36'
}

ITEM_PIPELINES = {
    'itheimaSpider.pipelines.ItheimaspiderPipeline': 300,
}
最后在 itheimaSpider/ 输入运行爬虫命令
scrapy crawl itheima -o itheima.csv保存数据在 itheima.csv 文件中
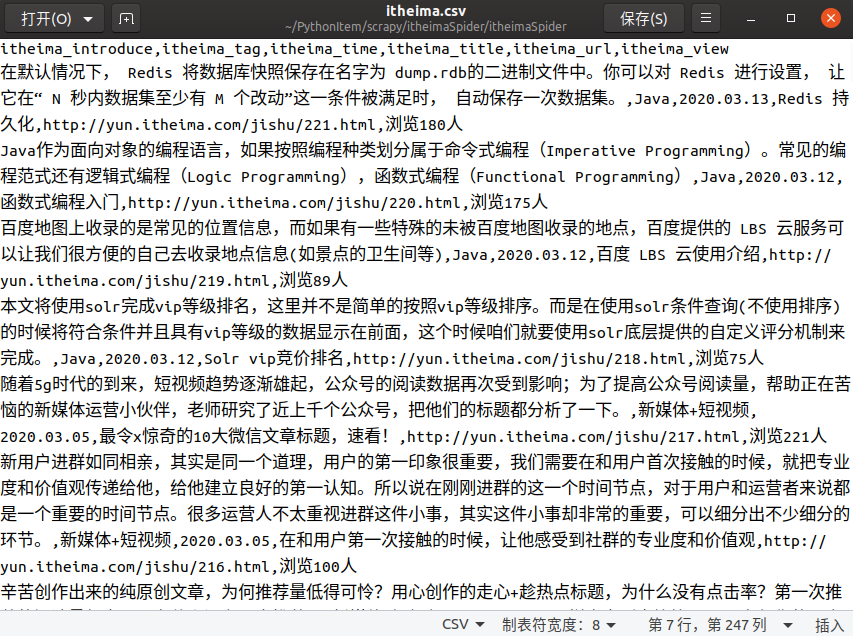
0x007 Scrapy 爬虫进阶(多级页面)
上个案例介绍了如何在多个分页中爬取到我们想要的数据,接下来这个案例将介绍如何在多级页面中获取到我们想要的数据。
本次演示网站为https://www.ivsky.com/bizhi/ ,目标是爬取该网页中所有图集中的图片
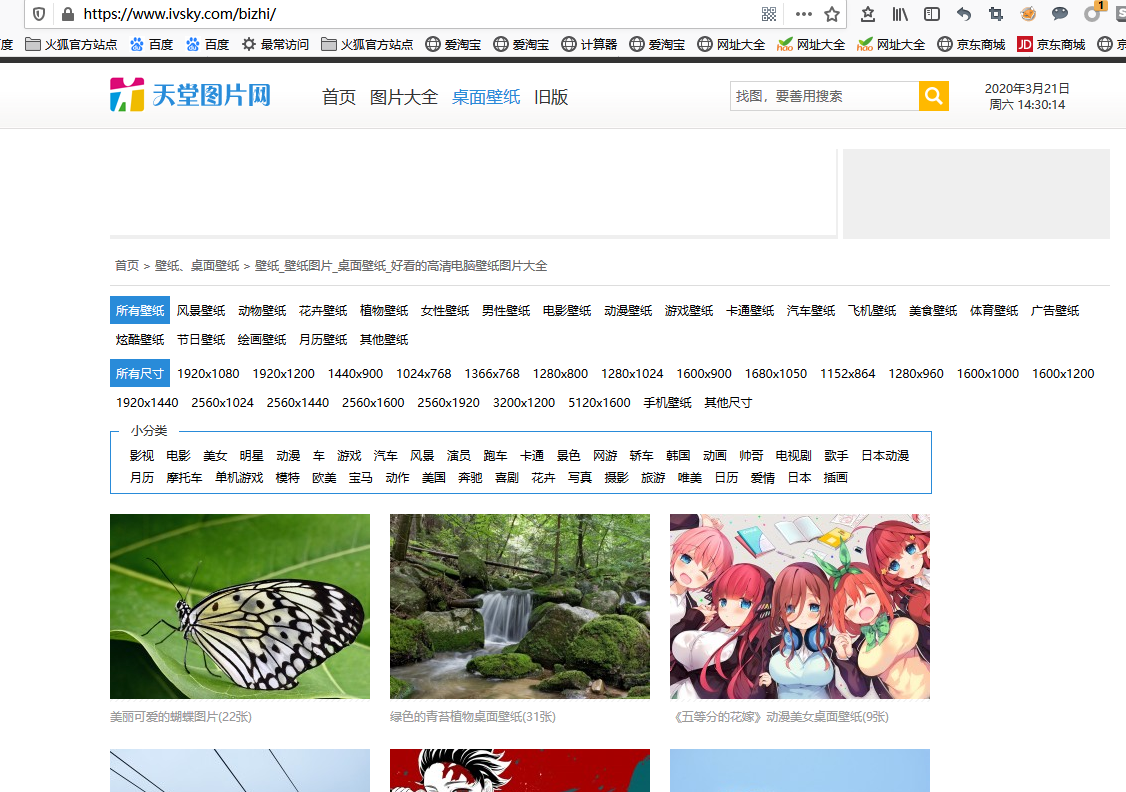
本次为三级页面示例,通过一级壁纸首页,找到二级图集首页,再通过图集找到三级图片页面地址,最终目的是要爬取下载所有图集中的图片。
一级:https://www.ivsky.com/bizhi/
    二级:https://www.ivsky.com/bizhi/hudie_v58539/
        三级:https://www.ivsky.com/bizhi/hudie_v58539/pic_921157.html
步骤一 新建爬虫项目
新建一个名为 ivskySpider 的爬虫项目
scrapy startproject ivskySpider步骤二 明确抓取目标
- 明确目标:爬取
https://www.ivsky.com/bizhi/所有分页中的图片。 - 打开编写
ivskySpider/目录下的items.py。
import scrapy

class ItheimaspiderItem(scrapy.Item):
    # define the fields for your item here like:
    # 收集下载图片的url
    image_urls = scrapy.Field()
    # 供给管道下载使用
    images = scrapy.Field()
步骤三 制作爬虫代码
在 ivskySpider/ 目录下输入命令,自动生成 ivsky爬虫文件,-t crawl表示使用crawl的模板。
scrapy genspider -t crawl ivsky "ivsky.com"打开 ivskySpider/spider/ivsky.py 文件,默认增加的代码如下
# -*- coding: utf-8 -*-
import scrapy
from scrapy.linkextractors import LinkExtractor
from scrapy.spiders import CrawlSpider, Rule


class IvskySpider(CrawlSpider):
    name = 'ivsky'
    allowed_domains = ['ivsky.com']
    start_urls = ['http://ivsky.com/']

    rules = (
        Rule(LinkExtractor(allow=r'Items/'), callback='parse_item', follow=True),
    )

    def parse_item(self, response):
        item = {}
        #item['domain_id'] = response.xpath('//input[@id="sid"]/@value').get()
        #item['name'] = response.xpath('//div[@id="name"]').get()
        #item['description'] = response.xpath('//div[@id="description"]').get()
        return item
导入 items.py 文件
from ivskySpider.items import IvskyspiderItem修改 start_urls 值如下
start_urls = ['https://www.ivsky.com/bizhi/']先分析一下总共需要获取的url:首页翻页url,图集翻页url,以及图片链接url的格式,进行正则匹配获取,然后编写rules规则匹配
分析获取url逻辑顺序:
首页 url:www.ivsky.com/bizhi/
  首页翻页:不回调 url:https://www.ivsky.com/bizhi/index_d+.html
    图集首页:不回调 url:https://www.ivsky.com/bizhi/\w+_v\d+/
      图集翻页-》需回调:提取图片url,供下载使用 url:https://www.ivsky.com/bizhi/\w+_v\d+/pic_d+.html

写rule规则时与逻辑顺序相反:
rule图集翻页-》需回调:提取图片url,供下载使用 url:https://www.ivsky.com/bizhi/\w+_v\d+/pic_d+.html
  rule图集首页:不回调 url:https://www.ivsky.com/bizhi/\w+_v\d+/
    rule首页翻页:不回调 url:https://www.ivsky.com/bizhi/index_d+.html
      首页 url:www.ivsky.com/bizhi/
修改 rules 规则如下,其中 allow 值中的 \d+ 代表匹配1次或多任意数字值, \w+ 代表匹配1次或多次任意字符值,然后会自动匹配当前页面中所有符合该规则的url格式,更多规则点击查看正则匹配
rules = (
    Rule(LinkExtractor(allow=r'https://www.ivsky.com/bizhi/\w+_v\d+/pic_d+.html'), callback='parse_item', follow=True),
    Rule(LinkExtractor(allow=r'https://www.ivsky.com/bizhi/\w+_v\d+/'), follow=True),
    Rule(LinkExtractor(allow=r'https://www.ivsky.com/bizhi/index_d+.html'), follow=True),
)然后XPath匹配图片下载的链接
//div[@id='pic_con']/div/img/@src

response.xpath("//div[@id='pic_con']/div/img/@src").get()
注意:笔者这里
XPath遇到个坑,之前因为过分相信XPath Helper的验证机制,导致在这踩到坑了。有时候XPath Helper在谷歌浏览器中能正确匹配出想要的内容,但是到了Scrapy中却无法匹配到正确结果。这里强调如果遇到这种情况,建议手动在Scrapy shell中重新使用的XPath语法进行匹配,最后以此为正确结果。具体的情况请看本文结尾的小贴士分析。
修改 parse_item() 方法如下,主要是将获取的图片url进行list数组返回
def parse_item(self, response):
        item = IvskyspiderItem()
        image_url = "http:" + response.xpath("//div[@id='pic_con']/div/img/@src").get()
        image_list = []
        image_list.append(image_url)
        item['image_urls'] = image_list
        yield item
最后总结 ivskySpider/spider/ivsky.py 代码如下
# -*- coding: utf-8 -*-
import scrapy
from scrapy.linkextractors import LinkExtractor
from scrapy.spiders import CrawlSpider, Rule
from ivskySpider.items import IvskyspiderItem
from scrapy.pipelines.images import ImagesPipeline

class IvskySpider(CrawlSpider):
    name = 'ivsky'
    allowed_domains = ['ivsky.com']
    start_urls = ['https://www.ivsky.com/bizhi/']

    rules = (
        Rule(LinkExtractor(allow=r'https://www.ivsky.com/bizhi/\w+_v\d+/pic_\d+.html'), callback='parse_item', follow=True),
        Rule(LinkExtractor(allow=r'https://www.ivsky.com/bizhi/\w+_v\d+/'), follow=True),
        Rule(LinkExtractor(allow=r'https://www.ivsky.com/bizhi/index_\d+.html'), follow=True),
    )

    def parse_item(self, response):
        item = IvskyspiderItem()
        image_url = "http:" + response.xpath("//div[@id='pic_con']/div/img/@src").get()
        image_list = []
        image_list.append(image_url)
        item['image_urls'] = image_list

        yield item
步骤四 存储爬取内容
编辑 ivskySpider/ 目录下的 settings.py 文件,找到如下代码去除注释并修改代码。
ROBOTSTXT_OBEY = False
DEFAULT_REQUEST_HEADERS = {
'Accept': 'text/html,application/xhtml+xml,application/xml;q=0.9,image/webp,image/apng,*/*;q=0.8',
'User-Agent': 'Mozilla/5.0 (Windows NT 10.0; Win64; x64) AppleWebKit/537.36 (KHTML, like Gecko) Chrome/71.0.3578.98 Safari/537.36',
'Referer': 'https://www.ivsky.com', # 防止网站防跨域
}
ITEM_PIPELINES = {
'scrapy.pipelines.images.ImagesPipeline': 300, # 开启图片下载管道
}
# 添加代码设置下载路径
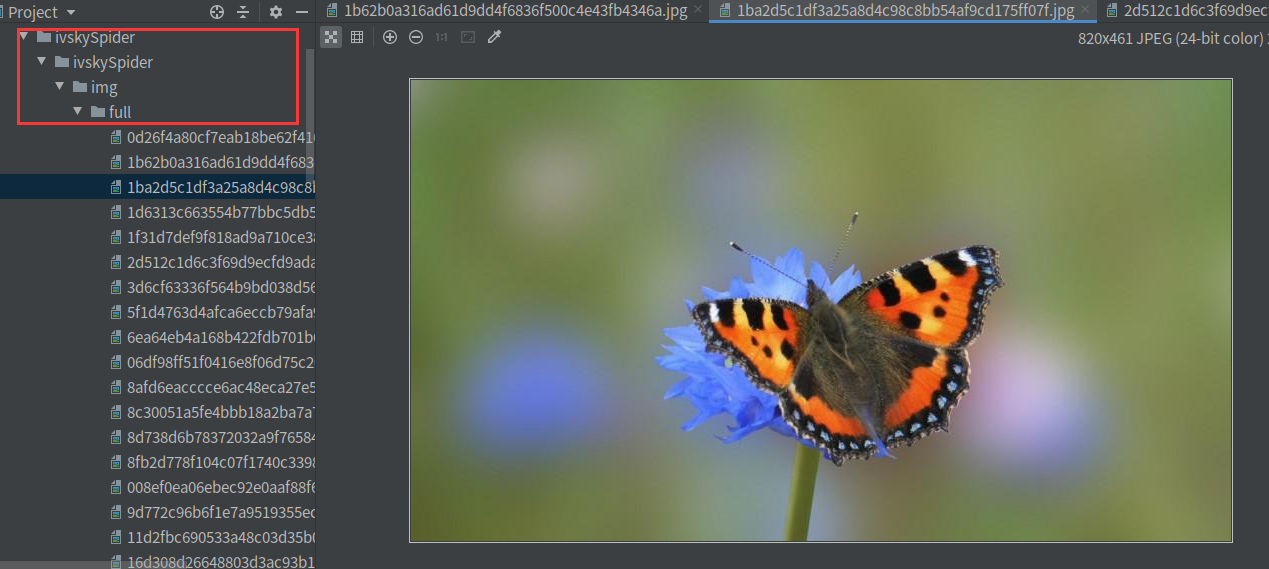
IMAGES_STORE = 'img'最后在 ivskySpider/ 输入运行爬虫命令
scrapy crawl ivsky保存数据在 ivskySpider/img/full 目录下
小贴士
这里着重提示真正的XPath语句以Scrapy shell中的语句为准,在其他的XPath插件中的语句仅供参考。
例如下面这种情况:两个XPath语句目的是为了匹配出图片的链接地址
首先是这句XPath,使用谷歌的XPath Helper插件匹配是正确的,没有问题
//a[@class='page-next']/img/@src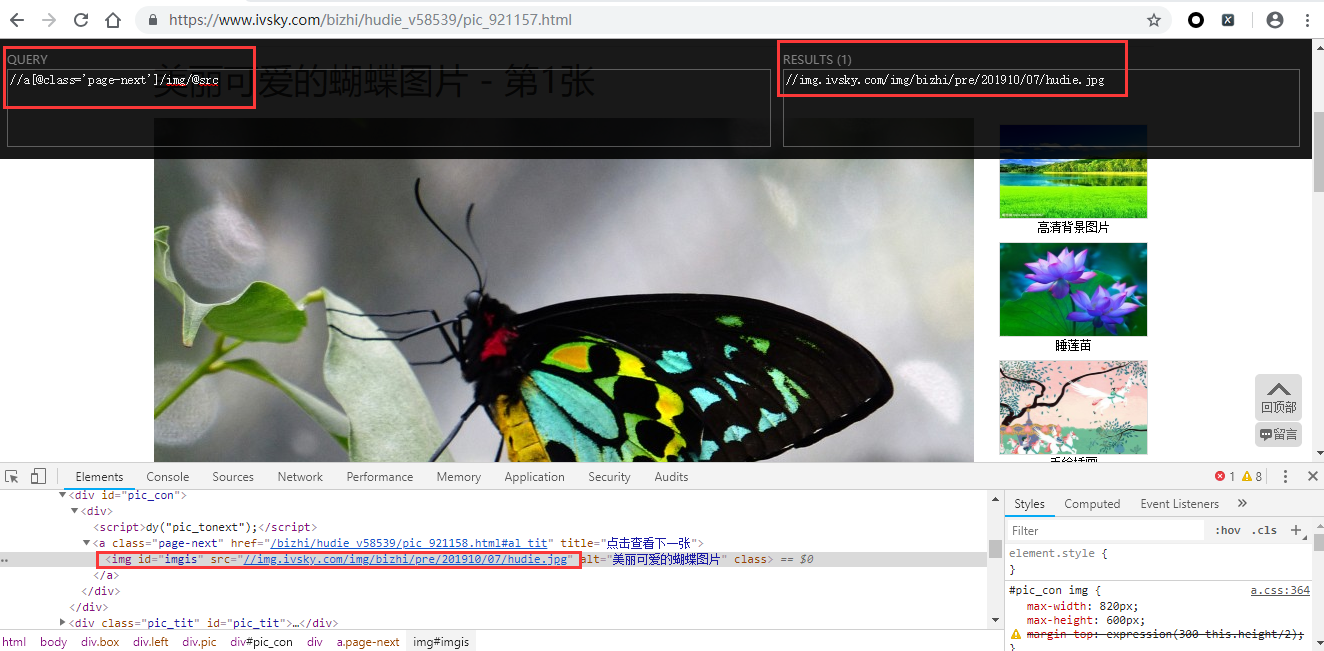
但是同样的这句话,到了Scrapy shell中却失效了,没有匹配到任何信息
zmj@ubuntu:~/桌面$ scrapy shell https://www.ivsky.com/bizhi/hudie_v58539/pic_921157.html
......
2020-03-21 05:10:15 [scrapy.core.engine] DEBUG: Crawled (200) <GET https://www.ivsky.com/bizhi/hudie_v58539/pic_921157.html> (referer: None)
[s] Available Scrapy objects:
[s]   scrapy     scrapy module (contains scrapy.Request, scrapy.Selector, etc)
[s]   crawler    <scrapy.crawler.Crawler object at 0x7fead038d610>
[s]   item       {}
[s]   request    <GET https://www.ivsky.com/bizhi/hudie_v58539/pic_921157.html>
[s]   response   <200 https://www.ivsky.com/bizhi/hudie_v58539/pic_921157.html>
[s]   settings   <scrapy.settings.Settings object at 0x7fead038d210>
[s]   spider     <DefaultSpider 'default' at 0x7feacfee26d0>
[s] Useful shortcuts:
[s]   fetch(url[, redirect=True]) Fetch URL and update local objects (by default, redirects are followed)
[s]   fetch(req)                  Fetch a scrapy.Request and update local objects
[s]   shelp()           Shell help (print this help)
[s]   view(response)    View response in a browser
In [1]: url = response.xpath("//a[@class='page-next']/img/@src").get()

In [2]: print(url)
None

In [3]:既然scrapy不认这句XPath,那么只好在scrapy shell重新手动匹配
In [3]: url = response.xpath("//div[@id='pic_con']").get()

In [4]: print(url)
<div id="pic_con"><div><script>dy("pic_tonext");</script><img id="imgis" src="//img.ivsky.com/img/bizhi/pre/201910/07/hudie.jpg" alt="美丽可爱的蝴蝶图片"></div></div>

In [5]: url = response.xpath("//div[@id='pic_con']/div/img/@src").get()

In [6]: print(url)
//img.ivsky.com/img/bizhi/pre/201910/07/hudie.jpg

In [7]:最后匹配到的真正url的XPath语句为
//div[@id='pic_con']/div/img/@src

response.xpath("//div[@id='pic_con']/div/img/@src").get()同样的再将scrapy shell匹配出的这句XPath放到谷歌浏览器中也没法匹配到url
造成这个原因是使用Scrapy在爬取目标网站时与在浏览器访问目标网站时的源码有些差距。